


One problem almost all portrait photographers are going to run into at one point or another is skin redness. We're human, there's blood flowing through our faces, it's inevitable and even natural.
Get Started for FREE
Sign up with Facebook Sign up with X
I don't have a Facebook or a X account


 Your new post is loading...
 Your new post is loading...
Your new post is loading...
One problem almost all portrait photographers are going to run into at one point or another is skin redness. We're human, there's blood flowing through our faces, it's inevitable and even natural. 
No comment yet.
Sign up to comment
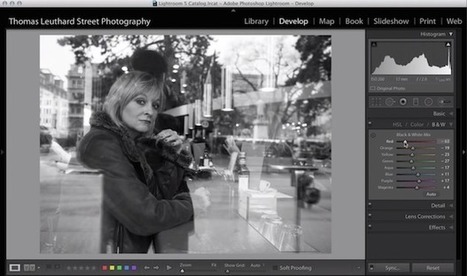
When it comes to street photography, much of the aesthetic appeal is the limited editing that usually takes place (or doesn’t take place, I guess), leaving the story and subject the focus of the image instead of creative editing.
Kitty Fisher's insight:
Importing straight to the workflow editing station. With the advice of Thomas Leuthard you should only take about a minute for each individual photo, taking the minimal and then build up your workflow from their.
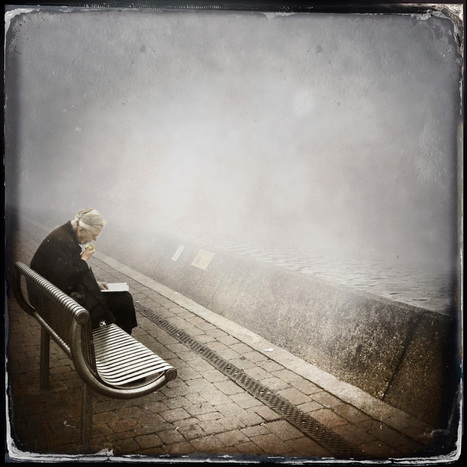
Creating a foggy atmosphere from a single ordinary street scene iPhone photograph including some complex masking using a combination of masking tools.
Kitty Fisher's insight:
Shooting in foggy weather is one thing. But being able to create a foggy atmosphere by blending and masking is a on a whole other league on its own. Find out how in this tutorial you can add this effect to your images.
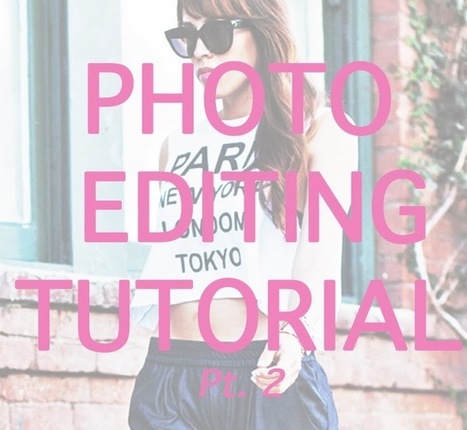
how to make my photos vibrant, increase vibrancy in photos, how to edit your own photos,
Kitty Fisher's insight:
Everyone has a way of editing their work. So sharing with you a another way to edit your images, this is a two part tutorial. As always with tutorial, the step by step is easy to follow but maybe you'll find a new way to edit in the process.
In this tutorial we will learn to edit image as nice light effect of photo manipulation to get a look like fashion photography style. Subscribe : www.youtube...
Kitty Fisher's insight:
To get that high fashion spread style, here is a tutorial that will give you the advice to achieve the type of lighting used in fashion shoots.

Tintype photos are more than just a black and white photo with a grunge layer blended on top.
Kitty Fisher's insight:
The tintype photos are those old school images that you may have come across in your grandparents or great-grandparents attic or basement. That grunge like style that invokes a whole array of mystery and possible story. Learn how to create your own in this tutorial.

In this tutorial, we will show you how to create a chalk logo effect in Photoshop.
Kitty Fisher's insight:
This just seems like too much fun, a chalk logo effect could mean those new Little Leagues jersey's or printing out a banner for the kids to add to their makeshift restaurant.

In this tutorial, we will show you how to create a Christmas card using digital illustration and digital painting techniques. I will begin, by first, showing you how to draw the card's main character, and typography. Then, I will shouw you how to add color, lighting and final details.
Kitty Fisher's insight:
What to brighten up this Holiday even more, by making your own card. This adorable character will look stunning, printed out and sent to various friends and family.

Creating a photo composite out of your own images is a great way of creating striking images that would be very hard, or perhaps even impossible to create in one individual capture. Follow our step-by-step tutorial and you will be combining your photos together in a professional, seamless way in no time. We’re going to take a look at how to cut out a model with the Pen tool and how to place her into the new canvas. It isn’t as simple as just dragging and dropping it in the new canvas. You need to edit the models edges so it is seamless, no dodgy hair cutouts can be accepted if you want your composite to be truly seamless, so to achieve this we’ll take a look at the Clone Stamp and Smudge tools. We’ll also look at re-sizing with the Free Transform tool and adjusting the lighting to ensure that the components match.
Kitty Fisher's insight:
Making a new composite of an image that you've already taken, may seem near to impossible. But with Photoshop and in this tutorial you can cut out subject with the Pen tool, and place them on a new canvas. But the editing around the edges may take a while since this part will be the hardest part. Also the Free Transform tool to adjusting light and making sure that each component lines up.

Kitty Fisher's insight:
Foodie's beware, this Photoshop tutorial is addictive. Not only was it fun to make the sweets but the cocktails can come out colorful and full of splashes of life. This will make your day, as it has for mine.
Using Adobe Muse along with a small workaround, we are able to use the scroll effects to make an image, such as a header or banner, fade away to white. Or any color really. Here I show you a combination of steps that will create a beautiful and polished final product.
Kitty Fisher's insight:
I have to say that this is a pretty fantastic way to use the scroll effects on Abode Muse CC. Whether or not you are experienced with Adobe Muse, this trick will help move things along. If not...it may be satisfactory to learn it.
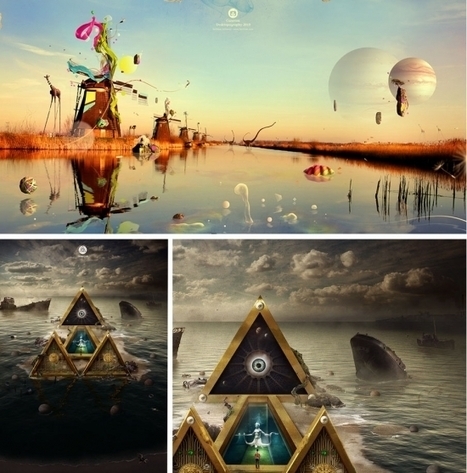
Editor's Pick in Photoshop TutorialsCheck out the following tutorial describing the technique of creating surreal bubbles and realistic water reflections. Absolutely worthy practise for confident web design beginners! Now we will adjust the background and make the colours a bit more surreal. Next to add contrast to the background to make the colours stronger. Brush very gentle around the borders of the selection (image 1). If you want to have more contrast while brushing, you can create a new layer. Look where the light is coming from and create highlights with your brush.
Kitty Fisher's insight:
As a new tutorial, this was a fun and unique angle towards digital art. That surreal, fantasy world can come to life on your desktop. By taking a regular photo you've taken and transforming it into a work of art.

This tutorial is the first part of a new short series called ” The Comprehensive Guide to Color in Photoshop.” In this tutorial, we will discuss how to set up your Swatches panel, how to work with the Preset Manager, how to choose and save new Swatches and how to export them from Photoshop.
Kitty Fisher's insight:
To be fair, when you're on Photoshop, the color swatches slips your mind (in the sense that you do not want to deal with them). All that takes effort, but it is better when you have a guide to lead you in down the right path.
|
Using Blurring, Sharpening, Dodging, Burning and Sponging in Pixelmator - Tuts+ Photography Tutorial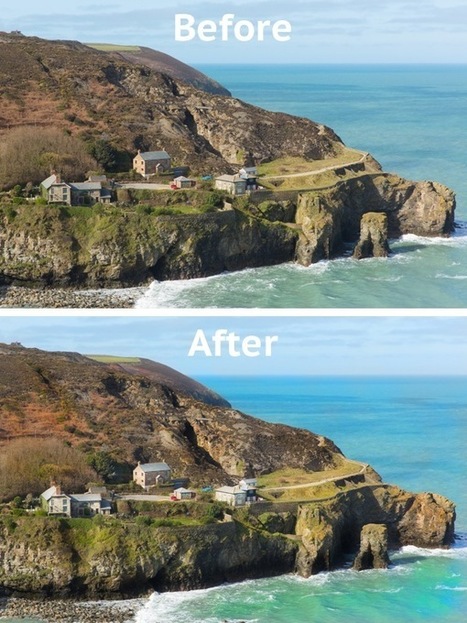
Pixelmator is an easy-to-use, fast, and powerful image editing app for the Mac. In this tutorial, I will show you how you can make an image stand out more by using, blurring, sharpening, burning, dodging and sponging. Let's get started! | Difficulty: Beginner; Length: Quick; Tags: Tools & Tips, Pixelmator
Kitty Fisher's insight:
Five essential tools are covered in this tutorial. From start to finish all the while having your image as 100% zoom gives you full coverage so the image won't be missing any spots or having too much of one thing and not the other.
There are many options for recovering shadow detail in post, but if you still haven't settled on one or you want a technique that will give you more control, then we have a great tutorial for you.
Kitty Fisher's insight:
Phlearn without a doubt brings some of the best tutorials. In this case recovering shadow detail since when it comes to highlights and shadows...their is no adjustment layer for that tool. Gaining that control will bring out what your image is missing.
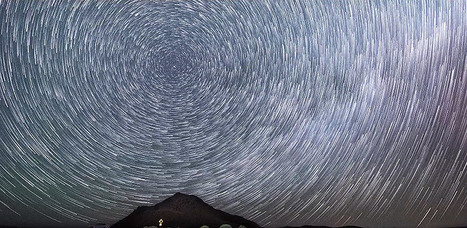
High ISO timelapse noise isn't so kind, creating a grainy mess when put into motion. In this tutorial video, I go into most of the obstacles that get in your way when shooting in the dark and tell you some of the solutions that have been learned through hundreds of hours of shooting while you were asleep.
Kitty Fisher's insight:
The right exposure time, a wide aperture and checking your histogram are great tips to creating a night timelapse. Even down to location, if a tip you should think about.

We're delighted to publish David Hayes' latest technical iOS Photography tutorial. This time it's on the very new and popular app, PhotoMotion.
Kitty Fisher's insight:
Here is a walk through demonstration of PhotoMotion. David Hayes, thoroughly gives us the know how to operate this popular system. So if you are new to this app, well low and behold you've come to the right website.
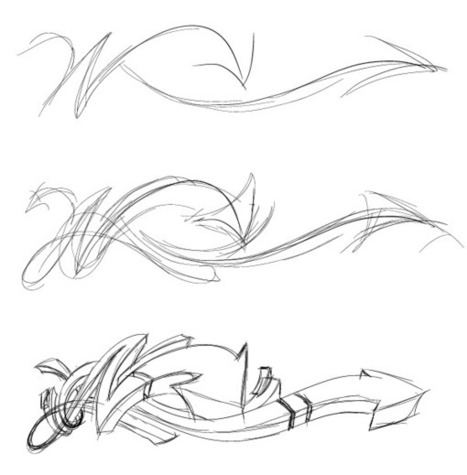
In the following tutorial I will show you how to create cool and bright graffiti arrows in Adobe Illustrator. You will learn how to create wild styled graffiti design elements using the Paintbrush Tool first (for sketching) and the Pen Tool (making forms and colors). Lets fun! | Difficulty: Advanced; Length: Long; Tags: Illustration, Tutorials, Art, Vector
Kitty Fisher's insight:
Graffiti is mainly a hand made art. In this tutorial you will figure out how to create a simple design but you can always change up to have your own flair to it.
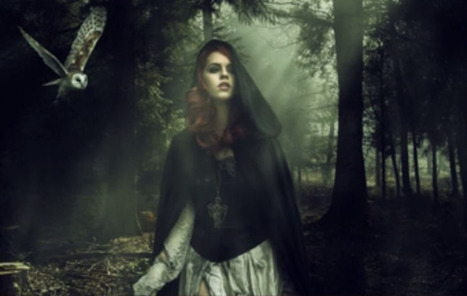
Learning how to Create a Dark Forest Photo Manipulation in Photoshop to create a emotional photo manipulation is great fun. In today's tutorial, Marcin Mikus, teaches you how to create a Photo Manipulation using a blend of different images, Mist Brushes, Fog Brushes, Light Beam Ray Brushes and various effects all to create a moody photo manipulation. Photo manipulations allow you to explore your creativity and create stunning and surreal works of art. If you like experimenting and learning new techniques in Photoshop, following along with some photo manipulation tutorials can be a great exercise. You’ll learn techniques that you can put into practice in your own manipulation experiments, not just for following along with the example in the tutorial.
Kitty Fisher's insight:
What a way to get that dark effect. Like the image above, this tutorial is a guide to the type of setting you would want to invoke a certain emotion.
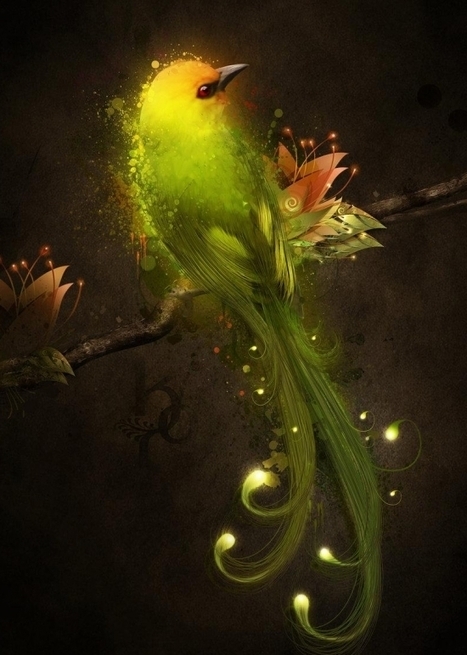
Editor's Pick in Photoshop TutorialsToday we would like to present you this amazing and gorgeous tutorial on how to create a bird of paradise look. Assemble your stock photos, textures, and brushes. This image was created using one stock photo, two sets of splatter brushes, and one texture. In this tutorial I will explain the tools, thought process, and techniques I used to create the image, getting into specifics only where necessary.
Kitty Fisher's insight:
A tutorial which mainly uses stock photos from DeviantArt. Taking one form of art to create a "night light" image in Photoshop, is in one word: breath-taking.
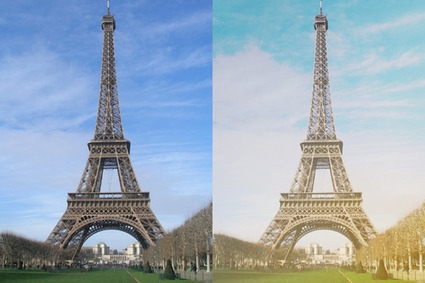
What’s needed? Photoshop or any photo editor that allows you to create gradients and set a blending mode to color dodge. Open the photo in your editing program and duplicate the background image. Set the duplicated layer to "color dodge" and set the opacity to around 60%. Play around with this etting. If using Photoshop, create a photo filter adjustment layer and from the drop down menu select sepia.
Kitty Fisher's insight:
Just to give you an idea, of how simple it is to transform your photographs into postcard type settings. The above information is what you would use while editing the photo. You may eventually want to start off your photography business with some postcard worthy images.
Website: http://phlearn.com/ Facebook: https://www.facebook.com/Phlearn Twitter: https://twitter.com/aknacer Google+: https://plus.google.com/105267656376269... (I favorited a @YouTube video http://t.co/CWuNlt8A7F...
Kitty Fisher's insight:
Graffiti can be immortalized in a number of ways, but what about adding it into a setting? I've never though about that because majority of the time you can go out and find a reasonably well graffitied area along a skate park. But this tutorial shows you how to add the street art with the tranform tool in Photoshop.
That’s the whole beauty of design isn’t it? The ability to adapt our style of design based on the creative brief, the context or the client. Today we’re going to create a seriously creepy human puppet hybrid using a regular portrait photo of a beautiful model. This is a tutorial packed full of useful techniques, and it’s also an outcome that you could recreate with your own portraits and really scare your friends (creepy profile picture anyone?). You’ll master a range of techniques including:
Kitty Fisher's insight:
What I love most about these halloween tutorials is, not only are you creating something that will be spooky and creepy. But along the way you'll be learning some new shortcuts and getting creative with your Photoshop. This one, though immediately takes the cake for being one of the creepest.
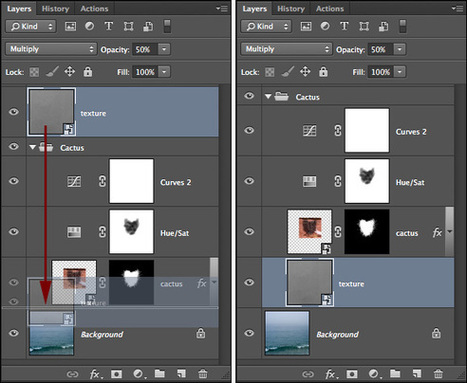
Dragging in the Layers panel to reposition a layer below a Layer Group can give different results than expected. In the example below, dragging and dropping the texture layer below the Cactus Layer Group, results in the texture layer being added to the Layer Group (inside of it, instead of below it).
Kitty Fisher's insight:
Learning to reposition your layer stacking order, can save you time and ultimately you'll find what your looking for. For some reason we never think to do this but this easy tutorial will go in-depth, basically just showing you which layers should go after or before, one another.

In this tutorial, we will take a look at an interesting way to make the most of your Camera RAW photos using Lightroom and Photoshop using a technique that will allow you to precisely control the exposure of your photographs.
Kitty Fisher's insight:
When it comes to light exposure, it can be a hit or miss opportunity for a photographer. So having the tools with Lightroom and Photoshop can take a photo you do not want to have to re-shoot or throw in the trash. To a beautiful portrait that could be of your family or a client. Video tutorials always help me out in the end, showing that step by step you know exactly what you are doing and what you want in the end.
|


Having rosy red cheeks is a natural occurrence. But if you are shooting a portrait and necessarily that isn't the one trait you want to show in the photo. Maybe that redness is blocking a direct line of sight to the model's eyes. Then this tutorial will quickly fade away those rosy cheeks.